论:电脑端如何点击相似图片如何点击指定区域的图片识别指定区域的图像在指定区域内找图 收藏
收藏
评论
收藏论:电脑端如何点击相似图片如何点击指定区域的图片识别指定区域的图像在指定区域内找图

Code拾光者(小新)
2025-07-31 01:12·浏览量:1618Code拾光者(小新)
 影刀专家
影刀专家 影刀认证工程师发布于 2025-07-31 01:08更新于 2025-07-31 01:121618浏览
一般不废话,代码如下,直接使用即可
# 使用提醒:
# 1. xbot包提供软件自动化、数据表格、Excel、日志、AI等功能
# 2. package包提供访问当前应用数据的功能,如获取元素、访问全局变量、获取资源文件等功能
# 3. 当此模块作为流程独立运行时执行main函数
# 4. 可视化流程中可以通过"调用模块"的指令使用此模块
import xbot
from xbot import print, sleep
from .import package
from .package import variables as glv
import os
import cv2
import numpy as np
from PIL import Image
from sklearn.cluster import DBSCAN
import xml.etree.ElementTree as ET
def find_image_by_name(image_name, region=None, threshold=0.8, cluster_eps=20):
"""
通过图片名称和区域坐标查找图片在屏幕中的位置
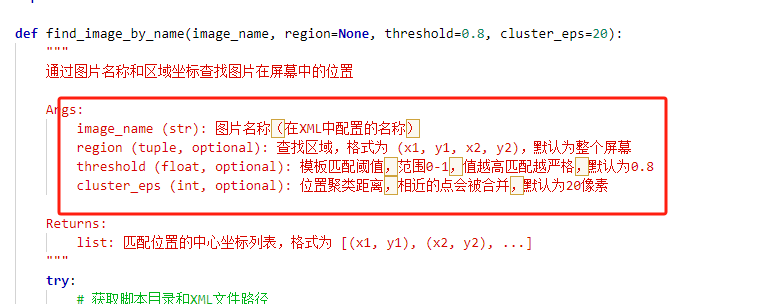
Args:
image_name (str): 图片名称(在XML中配置的名称)
region (tuple, optional): 查找区域,格式为 (x1, y1, x2, y2),默认为整个屏幕
threshold (float, optional): 模板匹配阈值,范围0-1,值越高匹配越严格,默认为0.8
cluster_eps (int, optional): 位置聚类距离,相近的点会被合并,默认为20像素
Returns:
list: 匹配位置的中心坐标列表,格式为 [(x1, y1), (x2, y2), ...]
"""
try:
# 获取脚本目录和XML文件路径
script_dir = os.path.dirname(os.path.abspath(__file__))
xml_file_path = os.path.join(script_dir, "imagesV2.xml")
# 从XML中查询图片路径
tree = ET.parse(xml_file_path)
root = tree.getroot()
image_path = None
for element in root.findall(".//imageelement"):
if element.get("name") == image_name:
image_path = element.get("filepath")
break
if not image_path:
raise FileNotFoundError(f"XML中未找到名称为 '{image_name}' 的图片配置")
# 构建完整图片路径
full_image_path = os.path.join(script_dir, image_path)
# 检查图片文件是否存在
if not os.path.exists(full_image_path):
raise FileNotFoundError(f"图片文件不存在: {full_image_path}")
# 读取模板图片
pil_image = Image.open(full_image_path)
template = cv2.cvtColor(np.array(pil_image), cv2.COLOR_RGB2BGR)
if template is None or template.size == 0:
raise ValueError(f"无法读取图片: {full_image_path}")
# 捕获屏幕
import pyautogui
screen = pyautogui.screenshot()
screen = cv2.cvtColor(np.array(screen), cv2.COLOR_RGB2BGR)
# 转换为灰度图进行匹配
screen_gray = cv2.cvtColor(screen, cv2.COLOR_BGR2GRAY)
template_gray = cv2.cvtColor(template, cv2.COLOR_BGR2GRAY)
# 获取模板尺寸
h, w = template_gray.shape
# 执行模板匹配
result = cv2.matchTemplate(screen_gray, template_gray, cv2.TM_CCOEFF_NORMED)
# 查找匹配位置
locations = np.where(result >= threshold)
positions = []
# 转换为坐标列表
for pt in zip(*locations[::-1]):
# 计算中心点坐标
center_x = pt[0] + w // 2
center_y = pt[1] + h // 2
# 检查是否在指定区域内
if region is not None:
x1, y1, x2, y2 = region
if center_x >= x1 and center_x <= x2 and center_y >= y1 and center_y <= y2:
positions.append((center_x, center_y))
else:
positions.append((center_x, center_y))
# 对相似位置进行聚类
if positions:
positions_array = np.array(positions)
clustering = DBSCAN(eps=cluster_eps, min_samples=1).fit(positions_array)
labels = clustering.labels_
unique_labels = set(labels)
clustered_positions = []
for label in unique_labels:
cluster_points = positions_array[labels == label]
center_x = int(np.mean(cluster_points[:, 0]))
center_y = int(np.mean(cluster_points[:, 1]))
clustered_positions.append((center_x, center_y))
return clustered_positions
else:
print(f"未找到匹配的图片: {image_name}")
return []
except FileNotFoundError as e:
print(f"文件错误: {str(e)}")
return []
except Exception as e:
print(f"查找图片时出错: {str(e)}")
return []使用方法:
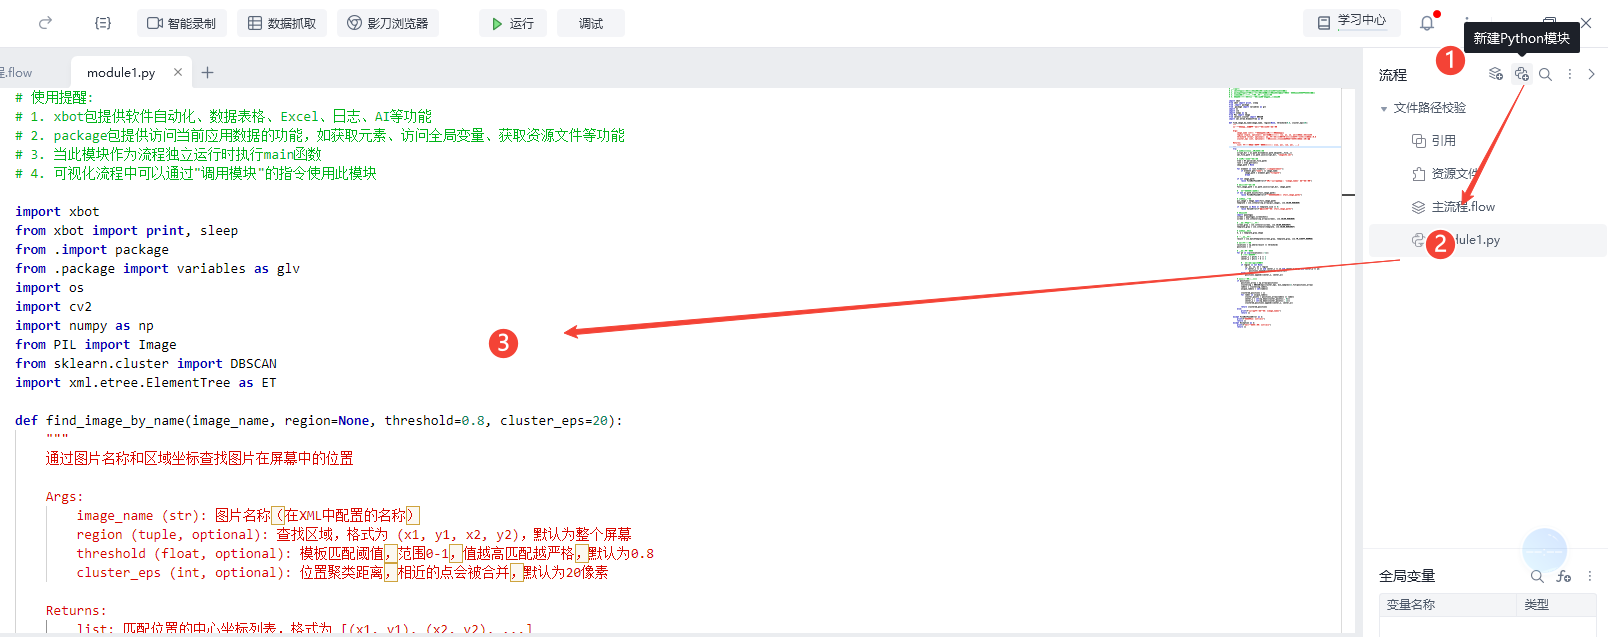
1、新建Python模块,然后直接拷贝代码进去即可
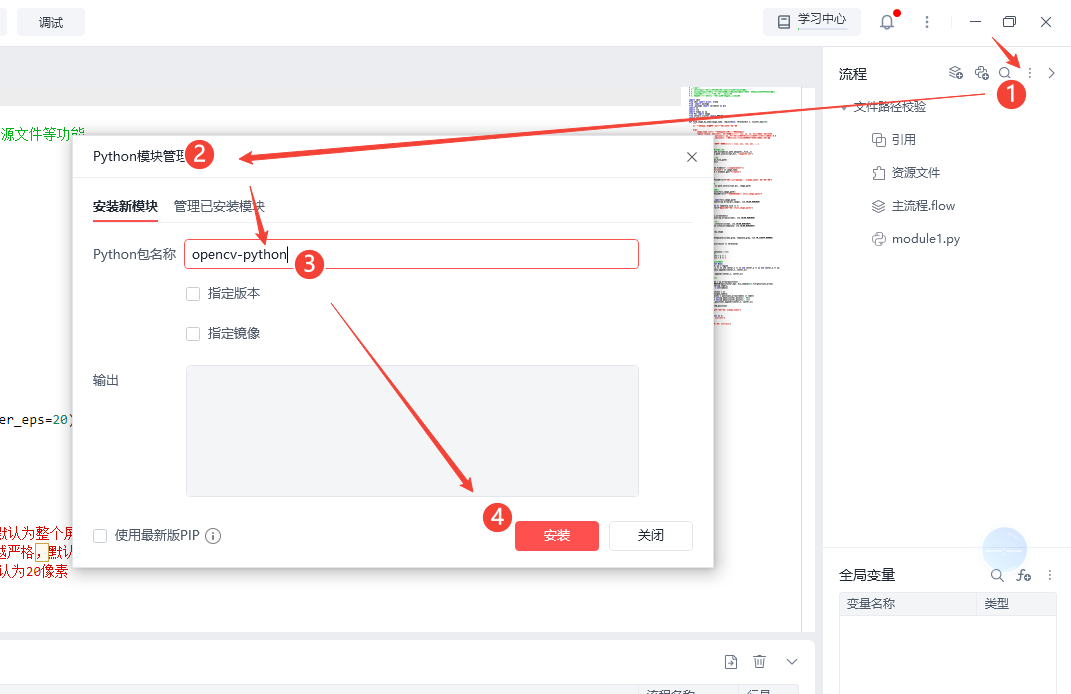
3、安装库:opencv-python、scikit-learn、 pyautogui
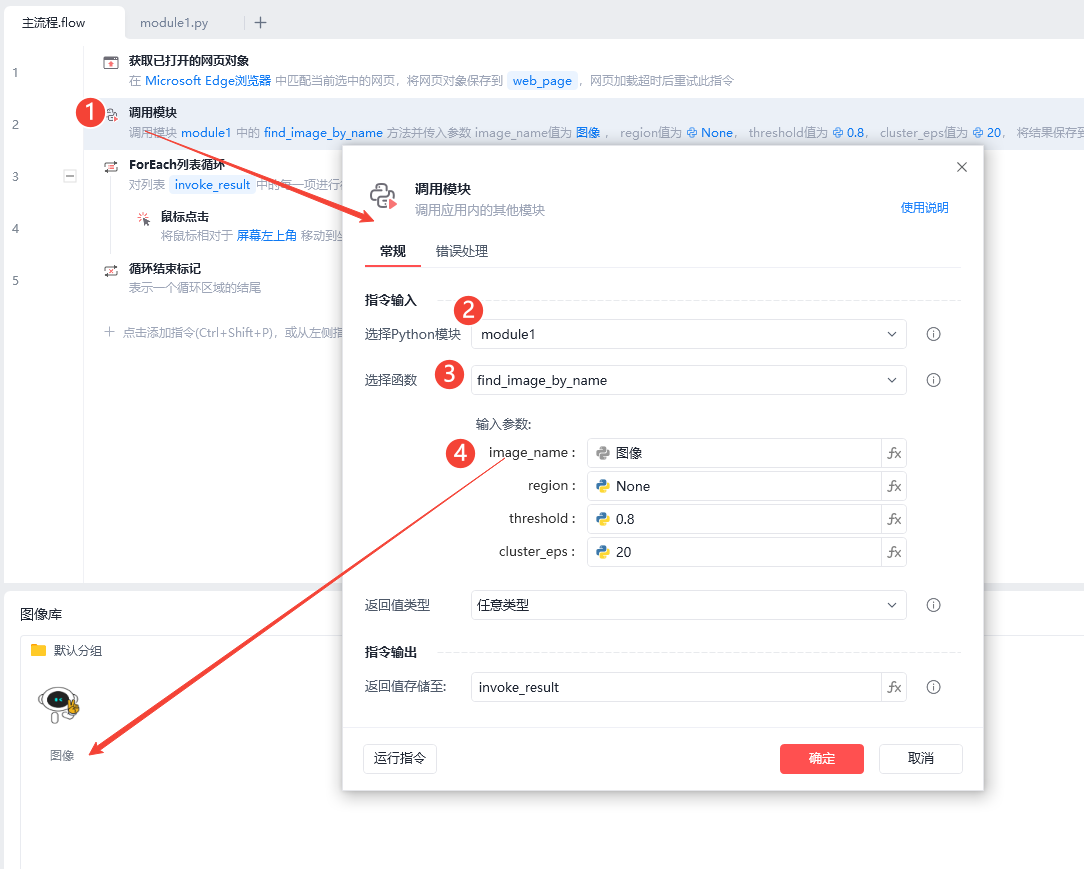
4、流程中使用《调用模块》指令
5、参数说明:
region (tuple, optional): 查找区域,格式为 (x1, y1, x2, y2),默认为整个屏幕
- x1: 矩形区域左上角的 X 坐标(从左向右递增)
- y1: 矩形区域左上角的 Y 坐标(从上向下递增)
- x2: 矩形区域右下角的 X 坐标
- y2: 矩形区域右下角的 Y 坐标
6、最终效果
收藏30全部评论(1)
最新
发布评论
评论


