一个通过AI+js逆向,解决验证码的详细思路和代码 收藏
收藏
评论
收藏一个通过AI+js逆向,解决验证码的详细思路和代码

2025-08-26 11:24·浏览量:1463
shendeju
网址是: https://www.hb56.com/Login.aspx?type=pw
附上解决方法供参考:
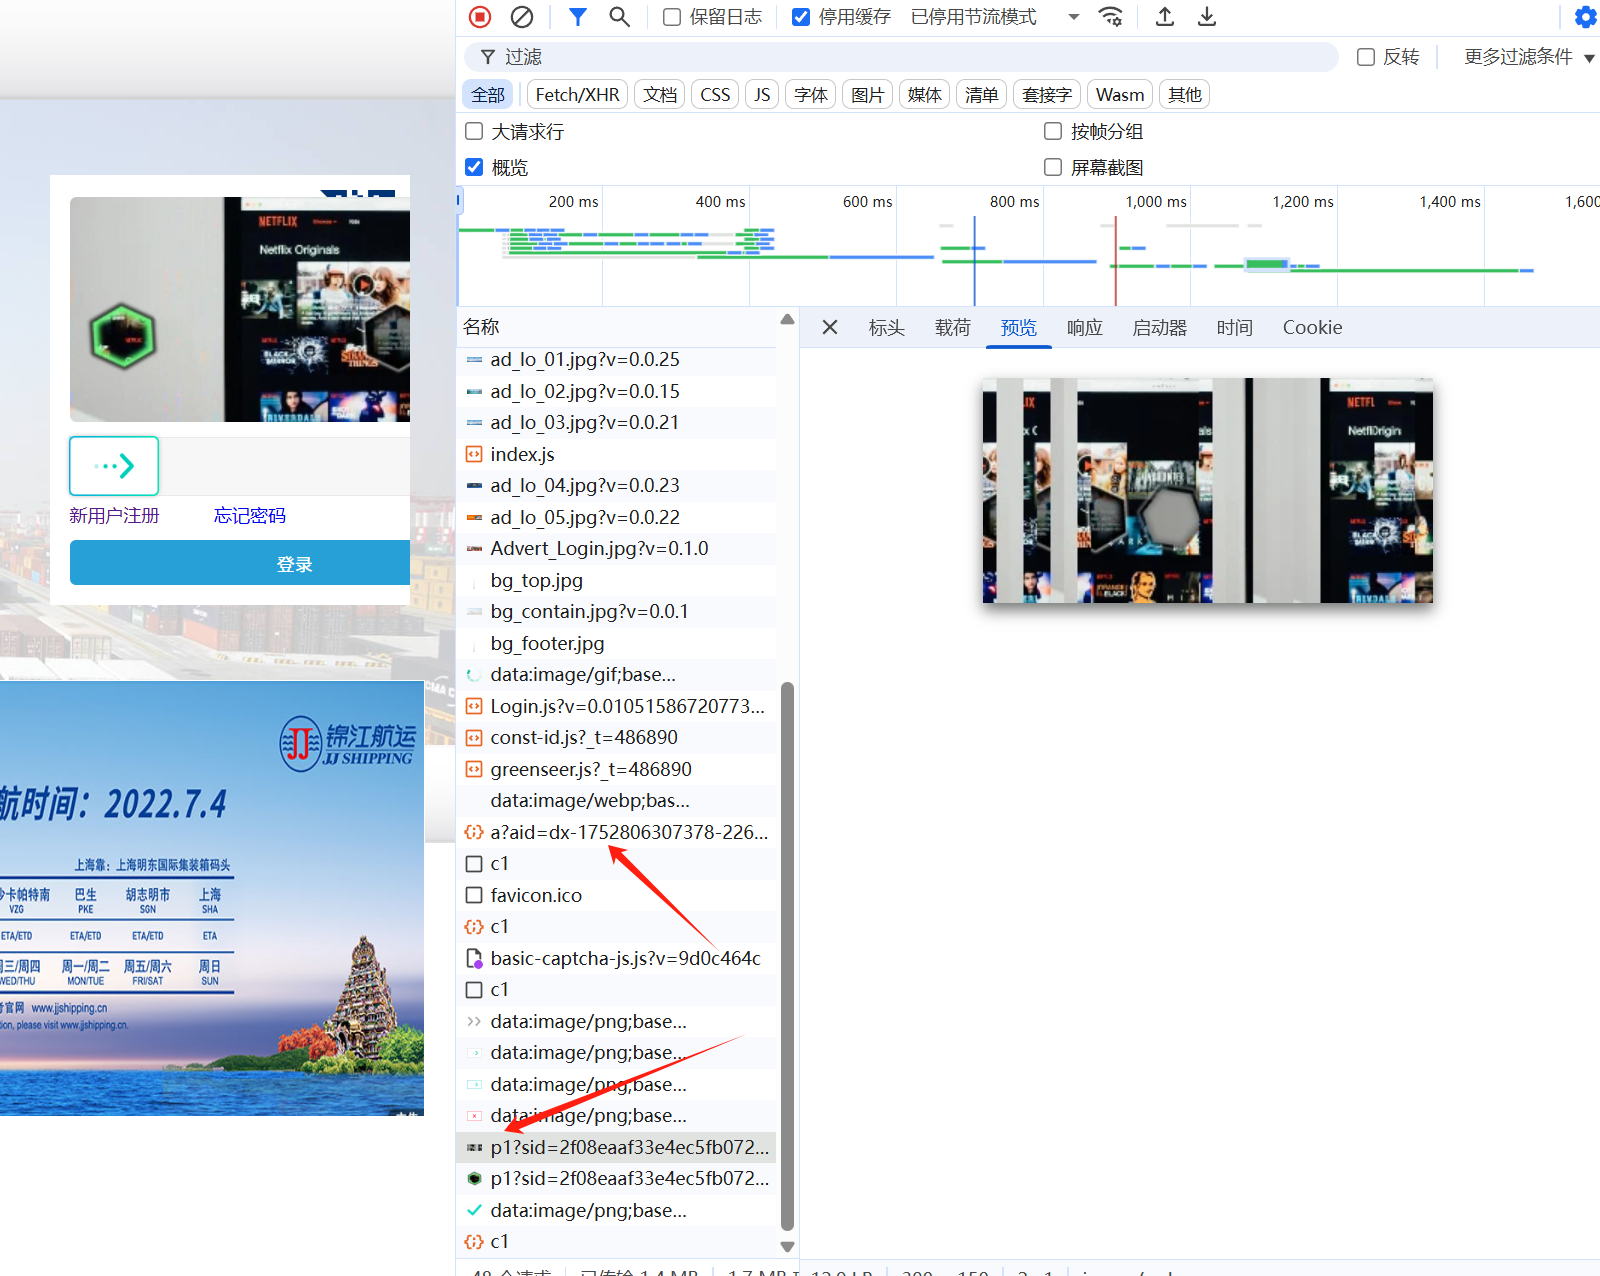
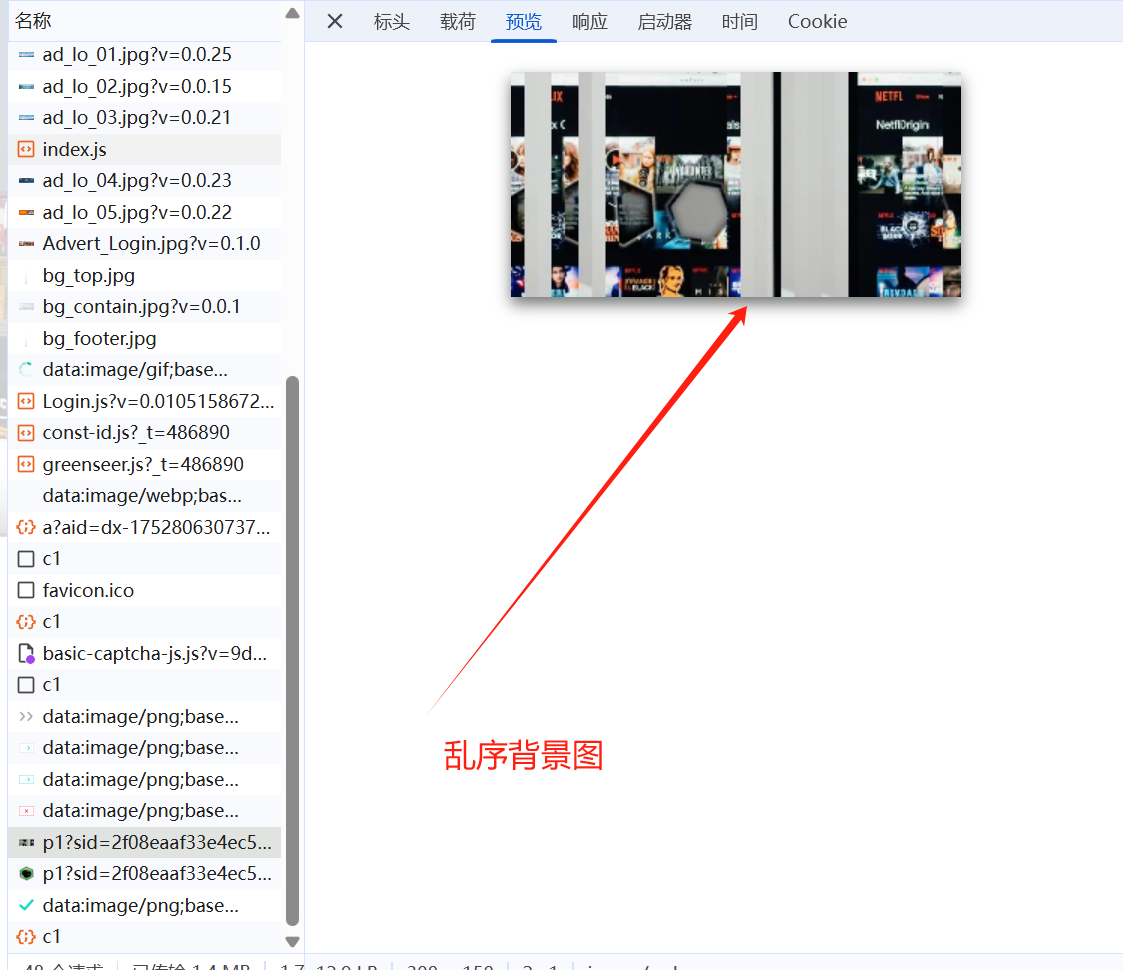
一、点开F12,会发现,每次刷新完,在你还没有点击触发验证码的时候,其实滑块图和背景图就已经加载了。背景图被乱序加密了。
实际使用的时候,再通过js把正确的图片渲染出来,画在页面的那个canvas上。
解密的js是basic-captcha-js.js那个,整个复制下来到txt,发给豆包去逆向。多轮battle之后,得到解密的代码如下:
from PIL import Image
import os
def generate_fragment_indexes(o_str, max_index):
"""生成索引数组(限制最大索引,适配300px宽度)"""
indexes = []
for c in o_str:
code = ord(c)
# 确保索引不重复且不超过最大允许值
while (code % 32) in indexes or (code % 32) > max_index:
code += 1
indexes.append(code % 32)
return indexes
def calculate_fragment_widths(total_width, fragment_count):
"""针对300px宽度优化:优先整除,避免余数过大"""
# 300px宽度下,优先选择能整除的宽度(如10、12、15等)
base_width = total_width // fragment_count
# 若不能整除,强制按base_width分配(舍弃余数,避免最后一段过宽)
return [base_width for _ in range(fragment_count)]
def recover_image(p1_path, o_str, output_path="recovered_image.png"):
"""针对300×150图片的复原逻辑,右侧黑色用原图填充"""
total_width = 300 # 固定宽度
total_height = 150 # 固定高度
try:
with Image.open(p1_path) as img:
# 校验图片尺寸是否匹配
if img.size != (total_width, total_height):
raise ValueError(f"图片尺寸必须为300×150像素,当前为{img.size}")
fragment_count = len(o_str)
if fragment_count == 0:
raise ValueError("o字段不能为空")
# 计算基础宽度(优先整除300)
base_width = total_width // fragment_count
# 最大允许索引(避免start_x超出300px)
max_index = (total_width // base_width) - 1
# 生成索引(限制在有效范围内)
indexes = generate_fragment_indexes(o_str, max_index)
# 计算片段宽度(300px下强制等宽,避免余数问题)
widths = calculate_fragment_widths(total_width, fragment_count)
# 创建结果画布(严格300×150)
result = Image.new('RGB', (total_width, total_height))
current_x = 0 # 拼接位置x坐标(不得超过300)
for i in range(fragment_count):
idx = indexes[i]
frag_width = widths[i]
# 计算原图中片段起点(核心:索引×基础宽度,严格≤300)
start_x = idx * base_width
# 终点强制不超过300
end_x = start_x + frag_width
if end_x > total_width:
end_x = total_width
frag_width = end_x - start_x # 修正宽度
# 切割并粘贴片段
fragment = img.crop((start_x, 0, end_x, total_height))
result.paste(fragment, (current_x, 0))
# 更新拼接位置(若超过300则终止,避免右侧多渲染)
current_x += frag_width
if current_x >= total_width:
break
# 检查是否有黑色空白(拼接后宽度不足300)
if current_x < total_width:
# 计算需要填充的宽度
fill_width = total_width - current_x
# 从原图右侧截取对应宽度的片段
fill_start_x = total_width - fill_width
fill_fragment = img.crop((fill_start_x, 0, total_width, total_height))
# 粘贴到结果画布的空白处
result.paste(fill_fragment, (current_x, 0))
result.save(output_path)
print(f"300×150图片复原成功!已保存至:{os.path.abspath(output_path)}")
return True
except FileNotFoundError:
print(f"错误:未找到图片文件:{p1_path}")
except Exception as e:
print(f"复原失败:{str(e)}")
return False
if __name__ == "__main__":
# 示例参数(300×150图片专用)
P1_PATH = r"C:\Users\shendeju\Desktop\p1.png"
O_STR = "c58b2e8f9465600a63e8af0a6a984704" # 片段数需接近30(10px/段)或20(15px/段)
OUTPUT_PATH = r"C:\Users\shendeju\Desktop\recovered_image.png"
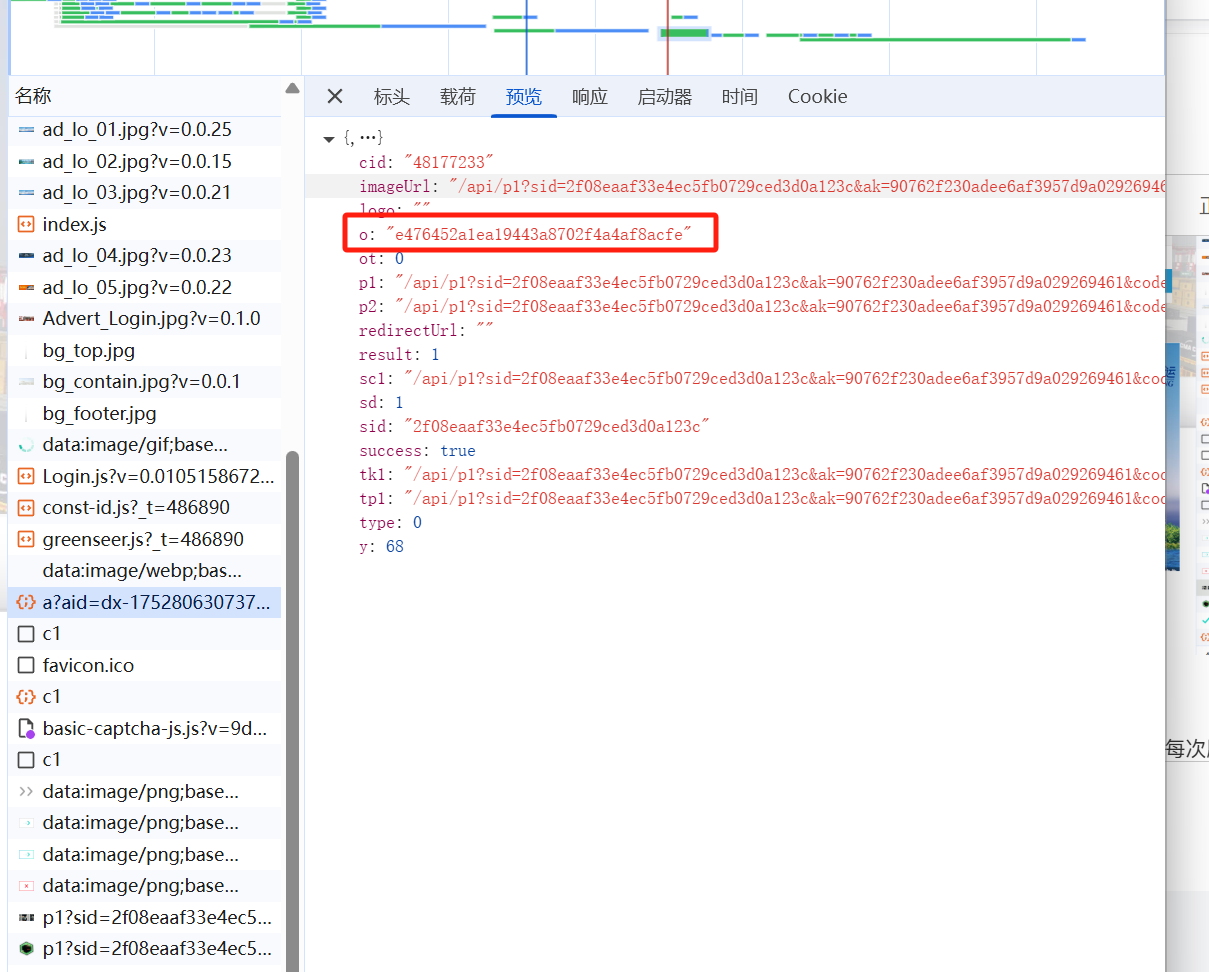
recover_image(P1_PATH, O_STR, OUTPUT_PATH)需要用到json里的那个o的值,复原图片就是靠这个o值。大家可以手动把图片下载下来,o值替换成json里面的o值,看看背景图是怎么复原的。
二、有了复原后的背景图、滑块图,但是发给打码平台之后,发现有两个问题:
1、这个图片里面有干扰项,一真一假两个缺口,准确识别度偏低;
2、即使是正确识别的图片,滑动的时候,也总是对不上。
问题1,可以通过自己跟ai要opencv的代码去解决,因为正确滑块颜色偏深,还是可以自己做出识别代码;
问题2,经过反复测试,发现还是在同样的js里,有一段变速代码。会生成9、11、12的随机数,然后除10,导致滑块图片的速度,跟拖拽按钮的速度不匹配,为0.9、1.1、1.2倍随机。
这个问题,后来通过本地替换js解决了,直接把速度改成1。

手撸的缺口识别代码如下:
import cv2
import numpy as np

def read_gray(path):
    """读取灰度图"""
    return cv2.imread(path, cv2.IMREAD_GRAYSCALE)

def get_contour(image_gray, canny_threshold1=50, canny_threshold2=150):
    """提取边缘轮廓(Canny边缘检测 + 轮廓查找)"""
    # 高斯模糊降噪
    blurred = cv2.GaussianBlur(image_gray, (5, 5), 0)
    # Canny边缘检测
    edges = cv2.Canny(blurred, canny_threshold1, canny_threshold2)
    # 查找轮廓
    contours, _ = cv2.findContours(edges, cv2.RETR_EXTERNAL, cv2.CHAIN_APPROX_SIMPLE)
    # 返回最大轮廓(缺口通常是最大的闭合轮廓)
    return max(contours, key=lambda x: cv2.contourArea(x)) if contours else None

def match_contour(p2_gray, p0_contour, p0_h, p0_w, step=5):
    """在p2中滑动窗口查找最匹配的轮廓区域"""
    min_dist = float('inf')
    best_loc = None
    p2_h, p2_w = p2_gray.shape

    # 步长调整为5以提高效率(可根据需要降低到1)
    for y in range(0, p2_h - p0_h + 1, step):
        for x in range(0, p2_w - p0_w + 1, step):
            # 提取当前区域
            roi = p2_gray[y:y+p0_h, x:x+p0_w]
            # 获取ROI的轮廓
            roi_contour = get_contour(roi)
            if roi_contour is None:
                continue
            # 计算轮廓相似度(值越小越相似)
            dist = cv2.matchShapes(p0_contour, roi_contour, cv2.CONTOURS_MATCH_I1, 0.0)
            if dist < min_dist:
                min_dist = dist
                best_loc = (x, y)

    # 精修位置(在最佳位置附近用更小步长搜索)
    if best_loc and step > 1:
        refined_min_dist = min_dist
        refined_loc = best_loc
        search_range = step * 2
        for dy in range(-search_range, search_range+1, 1):
            for dx in range(-search_range, search_range+1, 1):
                y = best_loc[1] + dy
                x = best_loc[0] + dx
                if 0 <= y < p2_h - p0_h + 1 and 0 <= x < p2_w - p0_w + 1:
                    roi = p2_gray[y:y+p0_h, x:x+p0_w]
                    roi_contour = get_contour(roi)
                    if roi_contour is None:
                        continue
                    dist = cv2.matchShapes(p0_contour, roi_contour, cv2.CONTOURS_MATCH_I1, 0.0)
                    if dist < refined_min_dist:
                        refined_min_dist = dist
                        refined_loc = (x, y)
        return refined_loc, refined_min_dist

    return best_loc, min_dist

def main(p0_path, p2_path):
    # 读取图像
    p0_gray = read_gray(p0_path)
    p2_gray = read_gray(p2_path)
    if p0_gray is None or p2_gray is None:
        print("图片读取失败!")
        return

    # 获取p0的轮廓和尺寸
    p0_contour = get_contour(p0_gray)
    p0_h, p0_w = p0_gray.shape[:2]
    if p0_contour is None:
        print("p0未检测到轮廓!")
        return

    # 匹配轮廓
    best_loc, min_dist = match_contour(p2_gray, p0_contour, p0_h, p0_w)

    # 可视化结果
    p2_color = cv2.imread(p2_path)

    if best_loc and min_dist < 0.15:  # 阈值可根据实际情况调整
        print(f"匹配位置:({best_loc[0]}, {best_loc[1]})")
        # 绘制匹配框
        cv2.rectangle(p2_color, best_loc, (best_loc[0]+p0_w, best_loc[1]+p0_h), (0, 0, 255), 2)
        # 显示匹配分数
        cv2.putText(p2_color, f"Match Score: {min_dist:.3f}", (best_loc[0], best_loc[1]-10),
                    cv2.FONT_HERSHEY_SIMPLEX, 0.5, (0, 0, 255), 1)
    else:
        print(f"匹配失败!最低距离: {min_dist:.3f}")
        # 显示p0的轮廓以供参考
        p0_color = cv2.cvtColor(p0_gray, cv2.COLOR_GRAY2BGR)
        cv2.drawContours(p0_color, [p0_contour], -1, (0, 0, 255), 2)
        cv2.imshow("p0轮廓", p0_color)

    # 显示Canny边缘检测结果(帮助判断参数是否合适)
    p2_blurred = cv2.GaussianBlur(p2_gray, (5, 5), 0)
    p2_edges = cv2.Canny(p2_blurred, 50, 150)
    p2_edges_color = cv2.cvtColor(p2_edges, cv2.COLOR_GRAY2BGR)

    # 合并显示原图和边缘检测结果
    combined = np.hstack((p2_color, p2_edges_color))
    cv2.imshow("", combined)
    cv2.waitKey(0)

if __name__ == "__main__":
    p0_path = r"C:\Users\shendeju\Desktop\temp_images\slide_image.png"
    p2_path = r"C:\Users\shendeju\Desktop\temp_images\background_image.png"
    main(p0_path, p2_path)
基本百发百中,秒杀各路api。
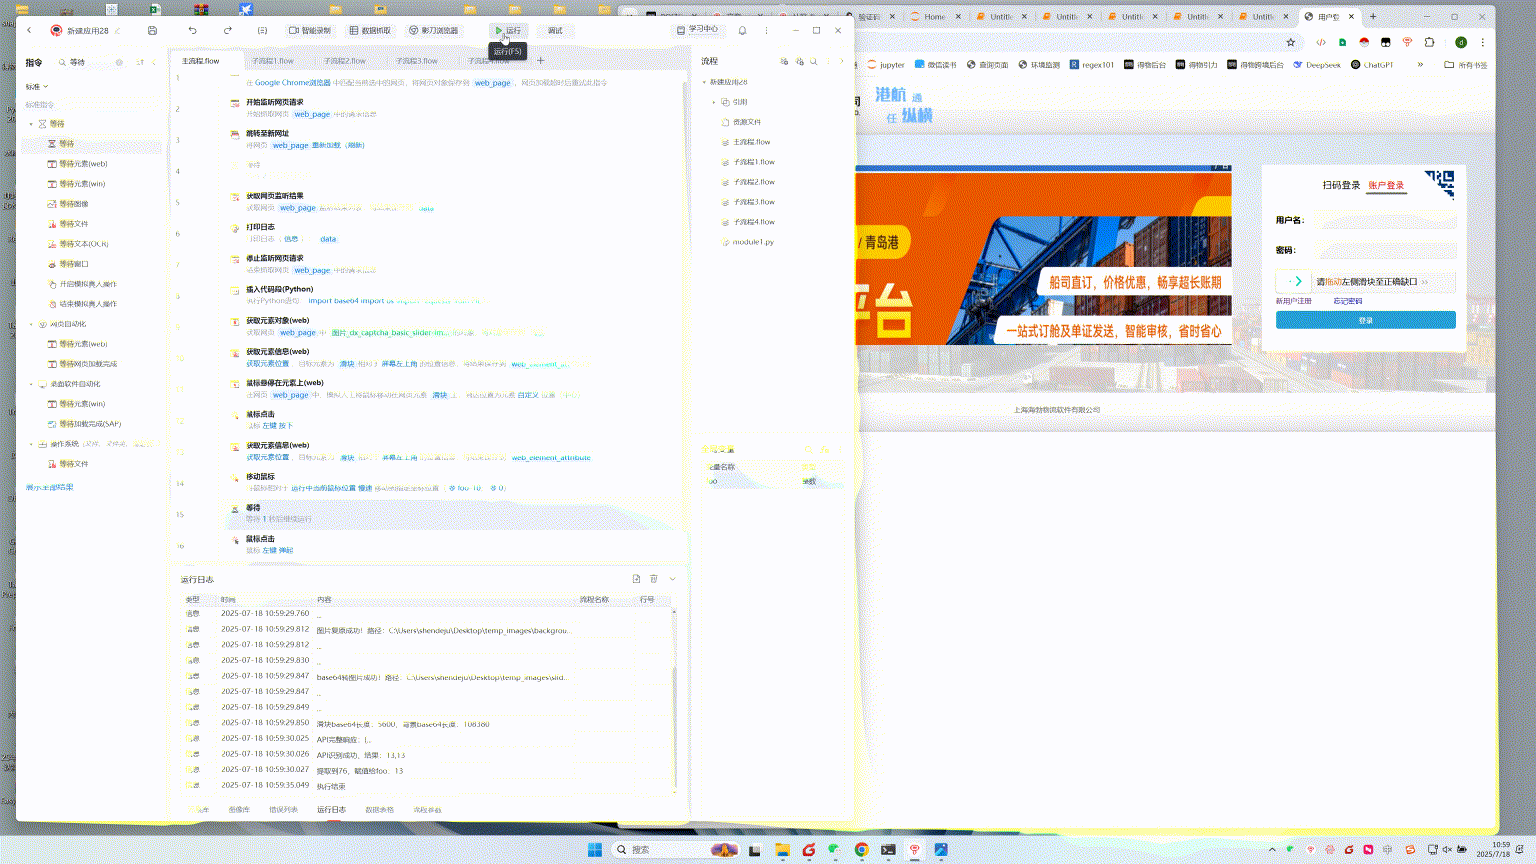
至此,这个验证码,算是解决了。整合一下代码段,直接插入到影刀就可以。

收藏15全部评论(1)
最新
发布评论
评论


